Is there anything dreamier than heading outside to pick some fresh herbs for cooking dinner with? I don’t think so! And making that dream come true is really not as hard or complicated as we are often told online that it is. Herbs are generally not hard to grow (tho some are dramatic exceptions to that rule) and are pretty forgiving overall! Which means that even if you don’t have the greenest thumb together we can grow a thriving herb garden 🙂
Below we are going to chat all about finding the right location, how to choose your herbs, growing tips and sooo much more! So let’s get into it so you can start your thriving herb garden-

How To Grow a Thriving Herb Garden Outside
Guide to herb gardening:
Step 1: Location, Location, LOCATION- choosing the right spot for your herb garden
The success of your herb garden heavily depends on the location.
But thankfully it really isn’t too challenging to find the best locations for an herb garden, it just can’t be neglected because a bad location will stop your garden from producing basically any herbs.
So Korra where is the best place for my herb garden?
- Herbs are pretty light dependent meaning you want somewhere in your yard where they can get 6-8 hours of direct light a day. So if you have part of your yard that gets shaded for over half the day by a neighbors home or something than that area isn’t right for your herbs. Look for somewhere with minimal trees or building that block the spot throughout the course of the day.
- Morning sun specifically is herbs favorite so depending on how and where your yard faces if you can prioritize your herb garden being somewhere that gets full morning sun then your herbs are going to THRIVE my friends!
- Keep proximity to your kitchen in mind too! You don’t want your herbs to be half a mile away from where you cook or you won’t end up actually using the herbs often 😦

I have my location picked but does it need to be in ground?
Nope!!! Herbs can thrive in containers just as easily as in ground and actually often better in containers. The only downside of containers instead of directly into the ground is that you do need to water them more. Since water will exit the container instead of staying in the ground near the roots. But really it’s only 1-2 more waterings a week but we will talk more about watering your herb garden in a minute.
Step 2: Choose your herbs wisely
Alright so choosing your herbs is both fun and a little bit daunting.
The first thing to think about is what herbs you will use! No use growing herbs that will never get used in any capacity in your life. So choose herbs you would love to use in cooking, baking, making oils, etc whatever your desire for herbs are!
Want to just focus on easy herbs? Or not really sure which ones you would use? Let’s chat about the easiest herbs quickly then-
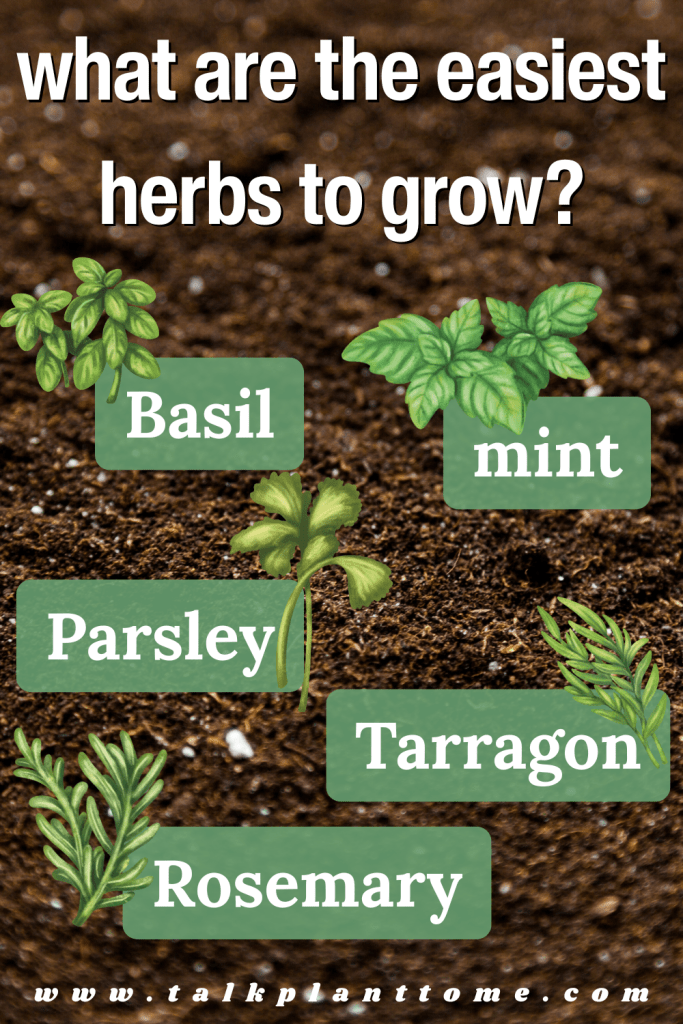
- Basil: A favorite in sooo many different cuisines, basil thrives in warm, sunny conditions and grows quickly, making it perfect for beginners who want quick results too. I don’t blame anyone for also being an inpatient gardener 😉
- Mint: Extremely hardy! So mint is ideal for first-time gardeners as it requires minimal care and spreads quickly, though it is best to grow it in pots to prevent it from taking over the garden. Like seriously they are psycho and will cannibalize the whole space they are in!!
- Parsley: Both flat-leaf and curly varieties of parsley are easy to grow. They tolerate partial shade and can even thrive in cooler temperatures, making them a versatile choice for various garden settings.
- Chives: Chives grow well in sun or partial shade and are perennial, so they’ll come back year after year, providing a mild onion-like flavor to dishes. A personal fav of mine!
- Thyme: Thyme is drought-resistant and can thrive in full sun, making it perfect for a low-maintenance garden; its tiny leaves pack a punch of flavor, ideal for seasoning meats, soups, and stews.
- Rosemary: With its preference for well-drained soil and plenty of sunlight, rosemary is another low-maintenance herb that’s perfect for gardens or containers and is excellent for adding depth to roasted dishes.
- Tarragon: if you want a unique but still easy herb this is my recommendation! Once established they basically grow on their own. It’s even perennial in zones 4-9 here in the US!!
Step 3: Soil makes all the difference
Herbs aren’t too picky when it comes to their dirt thankfully, but they do love well-draining soil. This is particularly important for potted herbs aka any in a container. As waterlogged pots lead to sad, soggy roots. Which then can lead to root rot which means the END of your herb garden which would be heartbreaking!! Mix in some organic matter or compost to give them a nutritious boost as well.
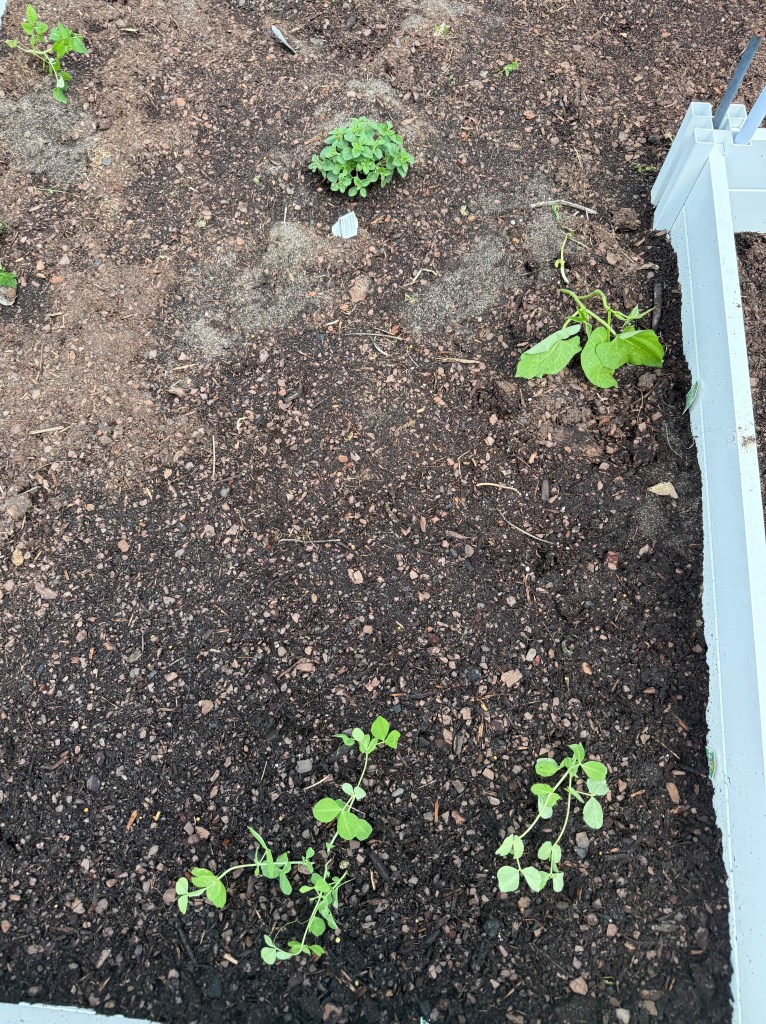
On a related note also make sure to space out the herbs, they need room to spread and stretch so they can produce as much as possible.
Step 4: Don’t let them get thirsty
While herbs don’t enjoy being soaked all the time, keeping the soil consistently moist is key to producing an herb garden that actually grows herbs.
The trick is to water deeply but infrequently, which encourages strong root development. Always check the top inch of the soil; if it feels dry, it’s time to water. You can use the knuckle trick on herbs- just stick your longest finger into soil and if your finger tip feels dry when your finger is up to the first knuckle in the soil then it’s time to water the herbs.
Step 5: Fertilize but with caution
Herbs will benefit from a bit of fertilizer, but it’s important not to overdo it. A light feed with an organic fertilizer every few weeks during the growing season should do the trick. Too much fertilizer can dilute the taste of your herbs, so keep it balanced guys!! I would always recommend when it comes to fertilizing edible plants to air on the side of caution.
Step 6: Pests….
Keep an eye out for pests like aphids and spider mites. We aren’t the only ones who love a delicious bite of an herb tho these pests free for all tasting buffet of your herb garden probably isn’t welcomed. So a gentle spray from a water hose or an application of neem oil can help keep them at bay without the use of harsh chemicals.
Step 7: Time to harvest!!
Harvesting and pruning herbs is pretty simple thankfully! Regular pruning encourages growth and leads to fuller plants. Harvest by snipping off just what you need, but never take more than a third of the plant at one time. This keeps your herbs healthy and productive.
Talk Plant To Me
If you enjoyed this article on How To Grow a Thriving Herb Garden Outside then you probably (hopefully!) will enjoy and find these articles helpful as well:
