
Are you looking to expand your indoor jungle without breaking the bank? Propagating rubber plants (Ficus elastica) is a fantastic way to grow your collection from an existing plant. These stunning, easy-to-care-for houseplants can add a touch of greenery to any space, and propagating them is simpler than you might think!
In this article, we’re going to walk you through the essential steps for propagating rubber plants. From selecting the perfect stem to creating the ideal environment for your cuttings, we’ve got all the tips you need to successfully propagate and nurture new rubber plants. So, grab your gardening tools and let’s get started on this exciting plant propagation journey!
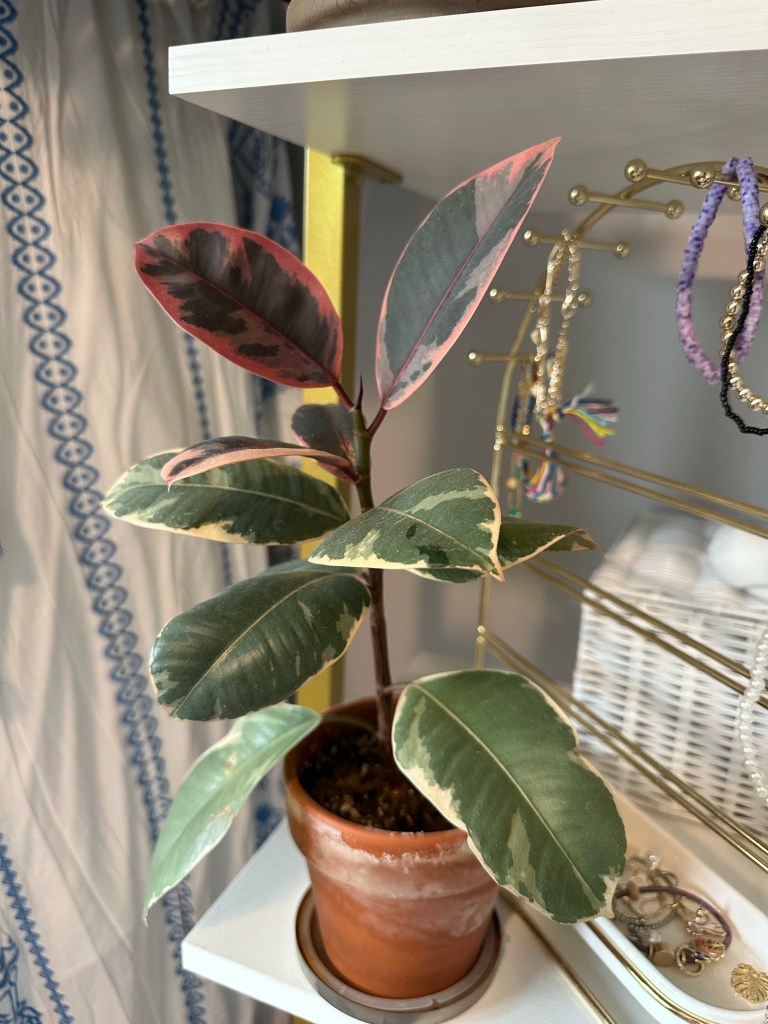
Ready to turn one rubber plant into many? Let’s dive in!

Essential Steps For Propagating Rubber Plants
How to propagate your rubber plant:
1. Choose the Right Time
- Best Season: Propagate your rubber plant during the growing season, ideally in spring or early summer, when the plant is actively growing. You can easily tell that it’s growing season because your beautiful rubber plant will have new leaves popping up.
2. Prepare Your Tools and Materials
- Tools: You’ll need a sharp, sterilized knife or pruning shears, rooting hormone (optional of course), a small pot, and potting mix. Ideally potting mix that is for propagating with lots of drainage. Also, make sure that the pot you use has a drainage hole. Personally, I prefer to propagate plants in soil with a terracotta pot.
- Materials: Have plastic bags or a plastic wrap, rubber bands, and water available. I like to use a spritzing bottle for my accessible water.
3. Select a Healthy Stem
- Stem Selection: Choose a healthy, mature stem with at least one or two leaves. Avoid stems with any signs of disease or pests. Also any leaves that are starting to yellow or is drooping, they may be healthy enough to survive but not to handle being the base of this next rubber plant.
4. Make the Cut
- Cutting: Using the sterilized knife or shears, cut a 4-6 inch stem just below a node (the point where a leaf attaches to the stem). The cutting should have one or two leaves attached. The clean shears by the way, is to make sure you aren’t transferring any diseases to your plant from other cuttings.
5. Prepare the Cutting
- Remove Lower Leaves: If there are leaves near the base of the cutting, remove them to expose the nodes. These are only leaves that are within a few inches of the base though!
- Optional Rooting Hormone: Dip the cut end of the stem into rooting hormone to encourage faster root development. Make sure to research the rooting hormone you purchase well before using it though. If you don’t have confidence in picking one out then don’t worry you can skip this step. It just may take longer for your rubber plant propagation to grow!
6. Plant the Cutting
- Potting Mix: Fill a small pot with well-draining potting mix. You can use a mix specifically designed for houseplants or make your own with equal parts peat moss, perlite, and vermiculite.
- Planting: Insert the cut end of the stem into the potting mix, burying it about 1-2 inches deep. Firm the soil around the cutting to ensure it is stable. But not too packed in where the water can’t seep down to the future roots.
7. Create a Humid Environment
- Cover: Cover the pot with a plastic bag or plastic wrap to create a mini greenhouse effect. This helps maintain high humidity around the cutting. OR (and this is the strategy I use) you can mist the plant regularly as well but remember that this “counts” towards watering and should be considered when thinking about when and how often to water.
- Secure: Use rubber bands to secure the plastic bag around the pot, but make sure there is some air circulation to prevent mold.
8. Provide the Right Conditions
- Light: Place the pot in a bright, indirect light location. Avoid direct sunlight, which can scorch the cutting.
- Temperature: Keep the cutting in a warm environment, ideally between 70-80°F (21-27°C). The biggest key with temperature in my experience is to keep the propagation away from windows that are opened regularly and air vents.
9. Watering
- Moisture: Keep the soil consistently moist but not waterlogged. Mist the cutting regularly to maintain humidity. Stick your finger into the soil to your second knuckle and if it’s dry all the way down then it’s definitely time to water the rubber plant propagation.
- Drainage: Ensure the pot has drainage holes to prevent water from accumulating at the bottom.
10. Wait for Root Development
- Patience: It can take several weeks for roots to develop. Check for root growth by gently tugging on the cutting after a few weeks. If you feel resistance, roots have started to form.
11. Transplanting
- Rooted Cutting: Once the cutting has developed a good root system (usually after 6-8 weeks), it’s ready to be transplanted.
- New Pot: Move the rooted cutting to a larger pot with well-draining potting mix. Continue to care for it as you would a mature rubber plant.
By following these steps, you can successfully propagate your rubber plant and enjoy the satisfaction of growing new plants from your existing one. Happy gardening!
Talk Plant To Me
If you enjoyed this article on Essential Steps For Propagating Rubber Plants then you probably (hopefully!) will enjoy nd find these articles helpful as well:

One thought on “Essential Steps For Propagating Rubber Plants”